


 🔔 Affiliate Disclosure
This content may contain affiliate links. If you click on a link and make a purchase, we may receive a small commission — at no extra cost to you. Thank you for supporting BeatInsights! 💛
🔔 Affiliate Disclosure
This content may contain affiliate links. If you click on a link and make a purchase, we may receive a small commission — at no extra cost to you. Thank you for supporting BeatInsights! 💛
Whale sharks, the gentle giants of the ocean, are truly magnificent creatures, and capturing their essence through art can be an incredibly rewarding experience. Did you know that these massive fish can grow to be over 40 feet long, yet they primarily feed on tiny plankton? This fascinating combination of immense size and gentle nature makes them a captivating subject for artists of all levels. This article serves as a comprehensive guide to Whale Shark Drawing. We will cover everything from the basic materials you need and fundamental shapes and proportions to step-by-step instructions for creating your own Easy whale shark art guide. Whether you are a complete beginner or have some experience with drawing, you will find valuable tips and techniques to help you succeed with this Drawing gentle sea giants tutorial. We will also explore more advanced methods for adding detail and texture, empowering you to create stunning Whale Shark Drawing. Learning How to draw a whale shark for beginners is possible for everyone, regardless of artistic background. So, let’s embark on this artistic journey and discover the joy of capturing the beauty of these amazing animals with Whale shark sketching techniques.
Why Draw Whale Sharks?
The allure of whale sharks as artistic subjects stems from several factors. For example, their unique patterns and impressive size provide endless inspiration. Moreover, creating a Whale Shark Drawing allows you to deeply appreciate their form and intricate markings. There’s also an educational component involved. By studying their anatomy and patterns closely, you gain a greater understanding of these fascinating creatures and their place in the marine ecosystem. Ultimately, the most rewarding aspect is the satisfaction of capturing the essence of these gentle giants on paper, showcasing their beauty and wonder for others to admire.
Essential Materials for Whale Shark Drawing
To begin your Whale Shark Drawing journey, you’ll need a few essential materials. Choosing the right tools can significantly impact the quality and enjoyment of your artistic process.
Pencils
A variety of pencils with different grades is recommended. HB pencils are great for sketching initial outlines, while softer grades like 2B and 4B are ideal for adding shading and depth. The softer the lead, the darker the mark it will make. Experiment with different grades to find what works best for you. General Pencil Sketching Pencils offers a good range of options for beginners.
Erasers
You’ll need two types of erasers: a kneaded eraser and a regular eraser. A kneaded eraser is perfect for lifting graphite and creating subtle highlights, while a regular eraser is useful for cleaning up lines and removing unwanted marks. Consider the Staedtler Mars Plastic Eraser for detailed erasing and the Prismacolor Kneaded Eraser for subtle graphite removal.
Paper
The type of paper you choose depends on your preferred medium and the desired effect. Smooth paper is suitable for detailed line work, while textured paper is great for adding depth and shading. For sketching and practicing, a simple sketchbook will suffice. However, for more finished pieces, consider using drawing paper or watercolor paper if you plan to use watercolor paints.

Optional Materials
Beyond the essentials, you can also incorporate other materials to enhance your Whale Shark Drawing. These include pens, markers, colored pencils, watercolor paints, and even digital drawing tools. Each medium offers unique possibilities for expressing your creativity and adding depth to your artwork. Furthermore, good lighting and a comfortable workspace are crucial for a productive and enjoyable drawing experience.
Breaking Down the Whale Shark: Basic Shapes & Proportions
Before diving into the details of How to draw a whale shark for beginners, it’s important to understand the basic shapes and proportions that make up its form. This foundational knowledge will help you create a more accurate and realistic representation. Start by envisioning the whale shark’s body as a simple oval or teardrop shape. This will serve as the foundation for the rest of the drawing. Then, add triangles for the dorsal fin and pectoral fins, paying attention to their size and placement relative to the body. The tail fin can be broken down into two crescent shapes.
Importance of Observation
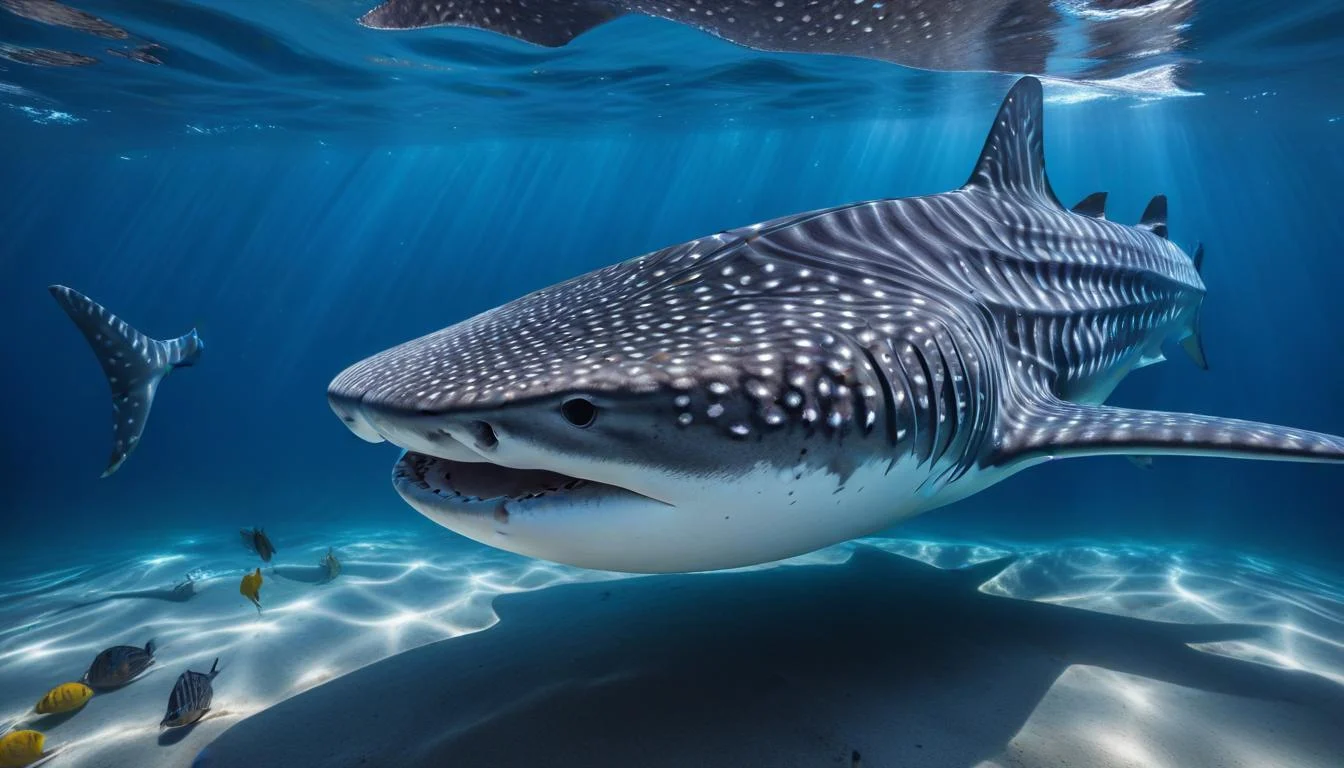
A critical step in this process is observing real whale shark photos. Studying reference images will help you understand the unique characteristics of their anatomy, including the shape of their head, the placement of their fins, and the overall proportions of their body. Pay close attention to the ratio of body length to fin size. The head is somewhat flattened and wide. Getting these proportions right is essential for creating a believable and visually appealing Whale Shark Drawing.
Step-by-Step: Drawing a Simple Whale Shark
Now, let’s move on to the step-by-step process of creating a simple Whale Shark Drawing. Follow these instructions carefully and don’t be afraid to experiment and adjust as needed.
- Lightly sketch the basic shapes: body, fins, and tail. Focus on the overall placement and size of each element.
- Refine the outline of the body, adding curves and contours to make it more naturalistic.
- Add details to the fins, including their shape and position. Pay attention to the subtle curves and angles.
- Draw the distinctive tail fin, carefully observing its curvature and the way it splits into two lobes.
- Erase any unnecessary guidelines that you used to construct the drawing.
- Add the eye and mouth, keeping them relatively simple. The eye is small and positioned near the front of the head.
- Begin adding the spots, emphasizing their placement and irregular shapes. Remember, each whale shark has a unique spot pattern.
- Add light shading to give the drawing depth and dimension. Focus on areas where the light would naturally fall, such as the top of the body.
- Review and refine the drawing, making any final adjustments to ensure that it captures the essence of the whale shark.
Adding Detail: Whale Shark Markings & Texture
One of the most distinctive features of whale sharks is their unique spot patterns. These patterns are so unique that they are often compared to human fingerprints.
The Unique Spot Patterns
Each whale shark has a one-of-a-kind arrangement of spots, making it possible to identify individual animals. These spots are not just random markings; they follow a specific pattern that scientists use for research and conservation efforts. When Drawing gentle sea giants tutorial, pay close attention to the placement and variation of these spots. They vary in size, shape, and density across the body. Some spots may be small and round, while others may be larger and more irregular. The density of spots also varies, with some areas having more spots than others.
To accurately depict these patterns in your Whale Shark Drawing, study reference photos carefully and pay attention to the subtle details. Consider using a fine-tipped pen or marker to create the spots, adding variation in size and shape to make your drawing more realistic. Remember, the key is to capture the essence of the spot pattern rather than trying to replicate it perfectly. This will give your drawing a more natural and authentic feel. By mastering this aspect of Whale Shark Drawing, you’ll be able to create truly captivating and realistic representations of these magnificent creatures. To learn more about the actual patterns on a Whale Shark, visit the Whale Shark Project website.
Let’s embark on an artistic journey to capture the magnificence of the ocean’s gentle giant. This guide provides techniques for creating realistic Whale Shark Drawing. Learning how to draw a whale shark for beginners can seem daunting, but with the right approach, you can master this fascinating subject. We will also explore drawing gentle sea giants tutorial, which is a comprehensive set of steps for beginners. We’ll guide you through an easy whale shark art guide that breaks down the process into manageable steps, ensuring a rewarding artistic experience. Further, we’ll uncover whale shark sketching techniques to elevate your artwork.
Creating Realistic Spot Patterns for Your Whale Shark Drawing
The most recognizable feature of a whale shark is its unique spot pattern. Replicating this accurately is key to a convincing Whale Shark Drawing. However, simply scattering dots randomly won’t suffice. A combination of randomness and clustering is essential. Firstly, begin by sketching the basic outline of your whale shark. Next, lightly map out larger areas where you want to concentrate the spots.
To achieve randomness, vary the size and shape of the spots. Some should be perfectly round, while others can be slightly oblong or irregular. Moreover, avoid spacing them uniformly. Use a range of sizes from small speckles to larger blotches. Clustering involves grouping spots together in certain areas, leaving other areas more sparsely populated. Observe reference photos carefully to identify where these clusters naturally occur on a whale shark’s body. You can check out the World Wildlife Fund page on Whale Sharks to see images and facts about them: WWF Whale Shark Page
Adding Texture to the Skin of Your Whale Shark Drawing
Beyond the spots, the skin texture adds another layer of realism to your Whale Shark Drawing. Stippling and cross-hatching are excellent techniques for achieving this effect. Stippling involves creating a pattern of tiny dots to simulate texture. The closer the dots are together, the darker the area appears, creating subtle variations in tone. This is particularly effective for depicting the slightly rough texture of the whale shark’s skin.
Cross-hatching involves drawing intersecting lines to create tonal variations. By varying the density and angle of the lines, you can simulate different textures and shadows. This technique is particularly useful for defining the contours of the whale shark’s body and adding depth to the drawing.
Enhancing Depth and Dimension with Highlights and Shadows in Your Whale Shark Drawing
Highlights and shadows are crucial for creating a three-dimensional appearance in your Whale Shark Drawing. Observe your reference photos carefully to identify where the light source is coming from and how it interacts with the whale shark’s body. Areas facing the light source will be highlighted, while areas facing away will be in shadow.
Use a combination of light and dark tones to create a sense of volume and form. Highlights can be achieved by leaving areas of the paper untouched or by using a lighter pencil grade. Shadows can be created by applying darker pencil grades or by layering hatching or cross-hatching. Remember to blend your shading to create smooth transitions between light and dark areas.
Shading Techniques for Depth & Realism
Shading is fundamental to bringing your Whale Shark Drawing to life. It transforms a flat outline into a three-dimensional representation.
Understanding Shading Basics for Whale Shark Drawings
Before applying any shading, establish your light source. This dictates where highlights and shadows will fall. Highlights represent areas where light directly hits the surface, while shadows are areas shielded from the light. The transition between light and shadow creates the illusion of form.
Utilizing Pencil Grades for Varied Shades in Your Whale Shark Drawing
Different pencil grades offer varying degrees of darkness. Harder pencils (H grades) produce lighter shades, ideal for highlights and initial sketching. Softer pencils (B grades) create darker shades, suitable for shadows and defining details. Experiment with different grades to achieve a full range of values in your Whale Shark Drawing.
Hatching and Cross-Hatching for Texture and Depth
Hatching involves drawing parallel lines to create shading. Cross-hatching layers these lines at different angles to build up darker tones and texture. Varying the spacing and thickness of the lines controls the darkness of the shade. These techniques are perfect for replicating the rough texture of a whale shark’s skin.
Blending for Smooth Transitions in Whale Shark Art
Blending creates smooth transitions between different shades. Use a blending stump, tortillon, or even your finger to gently smudge the graphite. This softens harsh lines and creates a more realistic look, particularly in areas where the light transitions gradually.
Creating Volume and Form Through Shading
Careful shading defines the volume and form of the whale shark. By strategically placing highlights and shadows, you can create the illusion of roundness and depth. Observe your reference photos closely to understand how light interacts with the whale shark’s body.
Grounding the Whale Shark with Shadows
Don’t forget to add a subtle shadow beneath the whale shark. This anchors it to the page and creates a sense of realism, suggesting that it’s interacting with its environment.
Drawing Whale Sharks in Different Poses
Capturing the dynamism of a whale shark involves drawing it in various poses.
Drawing a Whale Shark Swimming Towards the Viewer
This pose requires careful attention to perspective. The head will appear larger, while the body tapers towards the tail. Overlapping fins and body sections create depth. Use a light sketch to map out the proportions before adding details and shading.
Drawing a Whale Shark from a Side View
A side view is a classic pose that highlights the whale shark’s unique markings. Focus on accurately portraying the body shape, fin placement, and the distinctive spot pattern. Pay attention to the subtle curves and contours of the body.
Drawing a Whale Shark Breaching the Surface
Although whale sharks rarely breach, depicting this scene adds drama and excitement. Consider the angle of the body, the splash of water, and the play of light on the wet skin. This pose demands a good understanding of anatomy and perspective.
The Importance of Reference Photos
Reference photos are crucial for accuracy in any drawing, especially when depicting marine life. Use them to study the whale shark’s anatomy, proportions, and spot patterns. They also provide valuable information about lighting and texture.
Perspective’s Impact on Appearance
Perspective significantly affects how a whale shark appears in a drawing. Understanding perspective helps you create a realistic sense of depth and distance. This is especially important when drawing the whale shark from unusual angles.
Advanced Techniques: Adding Water & Background
Enhance your Whale Shark Drawing by adding water and a background. This creates context and atmosphere.
Techniques for Drawing Water
Drawing realistic water involves capturing ripples, reflections, and light refraction. Use light, wavy lines to depict ripples on the surface. Reflections can be suggested by mirroring elements of the whale shark and surrounding environment. Light refraction can be shown by subtly distorting objects viewed through the water.
Creating a Simple Ocean Background
A simple ocean background can be created with gradients and textures. Use lighter shades of blue and green near the surface, gradually darkening towards the bottom. Adding subtle textures, such as sand or seaweed, enhances the realism.
Enhancing the Scene with Marine Life
Adding marine life such as fish or coral brings your drawing to life. These elements provide scale, context, and visual interest. Consider the placement of these elements to create a balanced and dynamic composition.
Using Watercolor or Colored Pencils
Watercolor or colored pencils can add vibrancy and depth to your underwater environment. Use blues and greens to create a sense of depth and atmosphere. Experiment with different techniques to achieve a realistic underwater effect.
Creating Depth and Atmosphere
Create a sense of depth by gradually fading the background elements. Objects in the distance should be less detailed and lighter in tone. This creates the illusion of atmospheric perspective.
Common Mistakes & How to Avoid Them
Even experienced artists make mistakes. Here’s how to avoid common pitfalls in Whale Shark Drawing:
- Incorrect Proportions: Double-check the proportions of the fins and body against your reference photos.
- Uniform Spot Patterns: Remember that the spots are random and clustered, not evenly distributed.
- Flat Shading: Use a full range of values and blending to create depth and dimension.
- Ignoring References: Always use reference photos to ensure accuracy.
- Lack of Patience: Take your time and pay attention to detail.
Inspiration & Resources for Further Learning
To continue your artistic journey, consider these resources:
- Books: “Marine Art: Techniques for Painting Seascapes and Marine Life” by several artists offers comprehensive instruction.
- Websites: Explore online art communities like DeviantArt for inspiration and feedback.
- Aquariums & Documentaries: Visiting aquariums or watching documentaries provides firsthand observation of whale sharks.
- Online Tutorials: Search YouTube for tutorials on drawing marine life.
Conclusion: Celebrate Your Whale Shark Art!
In this guide, we’ve covered essential techniques for creating stunning Whale Shark Drawing. From realistic spot patterns and skin textures to dynamic poses and atmospheric backgrounds, you now have the tools to capture the beauty of these gentle giants. Remember to practice regularly, experiment with different techniques, and draw inspiration from the world around you. Share your whale shark drawings and continue exploring your artistic potential.